Mixing and Mastering “Firmament”
Posted: June 27th, 2023 | Author: Nathan | Filed under: interactive audio, music
A Project Thirty Years in the Making
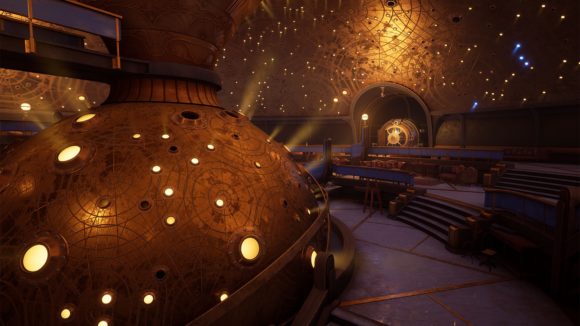
Cyan’s game Myst was the first game I ever finished more than once. That was the winter of 1993. I never would have guessed that exactly 30 years later, they’d release a game whose soundtrack I mixed and mastered. That game, scored by composer Maclaine Diemer, is Firmament.
I had worked with Maclaine before, mastering his episodic scores for Guild Wars 2 and both mixing and mastering his dark score for Salt and Sacrifice. Being asked to help work on a Cyan title was pretty exciting, especially after being thrilled by Maclaine’s desperate and grim Salt and Sacrifice material, and being told that he was going in a fairly dark emotional direction for Firmament. There was a time I’d have been nervous about such a gig, but this was about my 500th musical services project, so I was just more excited than anything.
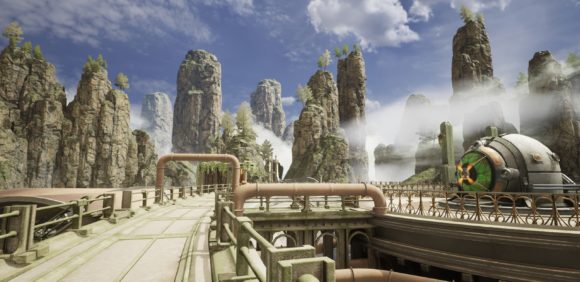
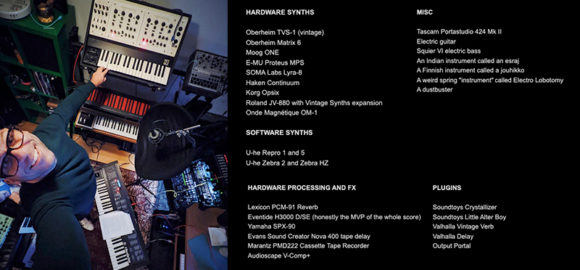
Maclaine’s approach was paying subtle homage to the original Myst score, composed by the game’s developer Robyn Miller, by using (and abusing) synths used on that game and effects from that era.

While not orchestral, each song was quite simple in terms of instrumentation…but the number of parallel processing effects was insane. Maclaine deep-dives into his process for creating the music in this interview, which is well worth watching. Projects that I mix don’t have to be in my favorite style or genre, of course, but this one sure hit me where I live, aesthetically speaking.
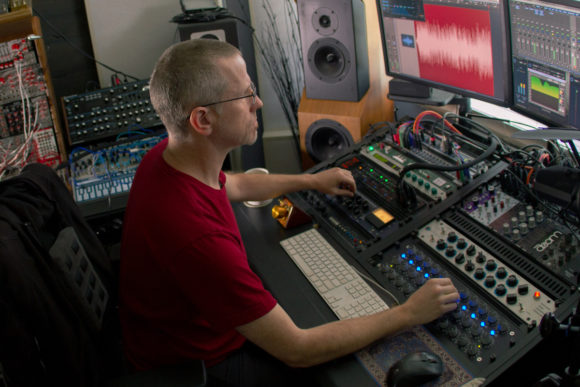
Mixing Firmament
The 25 cues we created for the game (21 were released on the official soundtrack) itself became a game of what effects layer was doing what job in the cue, so the mix was more about arranging the effects like they were parts of an orchestra. Some cues only had six tracks total; others had maybe only two or three instruments, but up to six layers of delay, in addition to other effects, per instrument.
One misstep I made was grunging Maclaine’s mixes up even further with additional saturation. When I was asked to pull back on it, it was not only the right decision, but a strange sort of victory. I found my client’s limit! From there, the mixing process was more streamlined with less guesswork.
While the track counts per mix never got that high, it was no mean feat balancing all these frequency- and time-domain effects to build “density with clarity.” Over eleven discrete rounds of mix deliveries, some cues took four or five revisions to get right. We got three nailed on the first try. The mixing process took approximately one month.
Mastering the Score
Mastering went quickly, but it’s always a challenge mastering work that you mix. I can’t do it without lots of translation tests and, frankly, time. I need to have my sense memory of the mixes fade away quite a bit. Being a game project, though, there wasn’t too much time we could take between mixing and mastering. I tested my mixes in a friend’s studio before starting the mastering process, taking notes of what I thought were issues. I listened on daily walks on AirPod Pros. I used nearfield monitors alongside my full-range mastering monitors, as well as a Bluetooth speaker.
For this project, my signal chain started with digital EQ and resonance control, and ended with all-analogue dynamics control. Tubes and transformers added a subtle mid-high sheen with no phase shift, which was a big help in a score with lots of low-end and low-mid frequencies. Mastering took about a week.
Lessons for Media Composers
One thing that’s always tricky when mixing is ensuring that all the tracks or stems are exported correctly, and this project was no different. Simply due to the number of individual files involved, I’ve never had a mixing project where all the stems or tracks were delivered perfectly the first time. Software is getting better at this, but there’s so many human elements involved that it’s important to remember it’ll never be perfect. Plan for re-exports, because that’s just going to happen, especially when track counts are high or stem deliveries get wide…like, maybe don’t go on vacation the day after you send all your tracks. (That didn’t happen on this project, thankfully!)
In my role, that means it’s critical to always call ask about anything that seems like it could be a mistake. Checking composer intent is essential at every step of the way. Composers can also proactively provide comments and notes to this effect. “Now, you’re gonna hear this sound that seems like an error, but trust me, the whole cue hinges on that sound…”
Every DAW also seems to have a different threshold at which it thinks that all effects tails have been printed fully. Speaking from experience, never trust your DAW to do this for you. Always pad each track with silence manually, or set your render region to where your meters are reading infinite negative dBFS. Add two seconds to the maximum delay time in your session if you’re not sure. That tip won’t work, though, with high-feedback delays, relying on meters and monitoring the tails at very high output levels is the only way to know for certain.
This project was fun, thrilling, and an absolute honor to be involved in. Huge thanks to Maclaine for having me on his team once again, and the whole team at Cyan for being so supportive of the composer and his vision for this interactive experience.
| No Comments »
Leave a Reply